29 March 2012

How to: Casual-Chic

                How many of you feel, to look like a fashionista we need to wear make-up, season styles & trends & all sorts of bizarre high fashion things.

But in reality you can look super stylish by wearing a plain white v-neck tee with blue jeans and still rock them, unless you know how to accessories them..But then again, “to each his own” is what I believe.
There is thin line between actually dressing up for an occasion and dressing up for your DAILY ROUTINE.  Now that we are heading for Summer, I am all in for dressing it up but it keeping it a notch down.
To get the Casual Chic you need to have collectable items (accessories) in your closet which can be worn with different outfits and look differently on every outfit like Scarves, rings, brooches , neck pieces, charms, belts,etc etc . I like investing in them because they are with me for keepsakes.

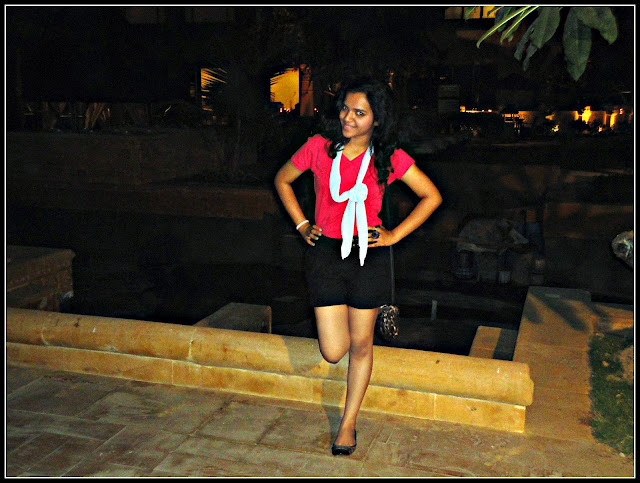
   Last weekend I had been to Marriott’s for a mini stay, I chose to wear {which in this case is dressing up for Casual-Chic} my black high waisted shorts, hot pink v-neck tee{I refuse to call hot pink a neon pink} and used my collectable items to accessorize them
  1. ü  Powder green scarf
  2. ü  Chunky rings
  3. ü  Bags
  4. ü  Mint blue BB cover

This is somewhere on the lines of a laid back style, which can go wrong if you go jha-jha around it. 


top-bare denim, scarf-westside, shorts - bare, shoes- dorothy perkins, bag- fiorelli lizzie, rings - veromoda.


                         Ohh, I made this, Because I don't want people to think that dressing up isn't cool!

24 March 2012

Easy Smokey Eye-make-up

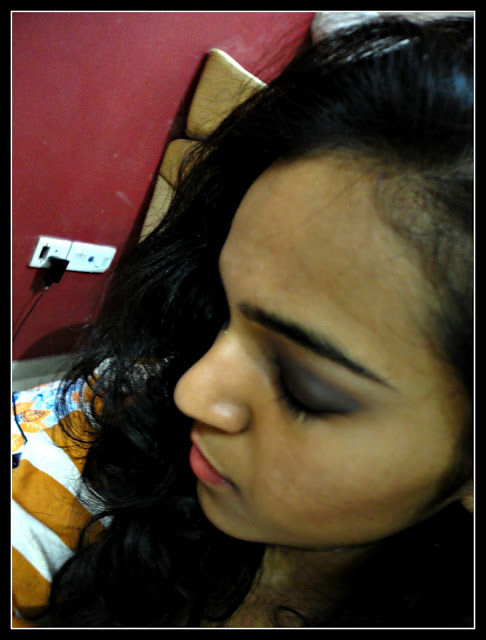
     Smokey eyes have always been a less traveled territory for me. I have never really cared that for my eye make-up. A quick black eye-kajal on my waterline & silver eye shadow {preferably Maybelline's eye studio white liner} on my inner tear dots.
       Just recently {I think} August '11, I started collecting eye shadows for myself. And that gave a start to thousands of trials and errors and constant you-tubing!
      Okay so finally, I have been able to master the art of a Smokey eye! When I say a smokey eye "here" I meant using two or more colors to create it.

So lets begin, I used Revlon's CustomEyes Smoky Sexy no.35 for this look, and I also used a silver eye shadow from the other palette called Mettalic Chic no.25.

About the palette:-
  • The applicator that comes with it is a Waste, Ignore and buy a new set of brushes!
  • The color is really pigmented and looks really pretty and not chalky.
  • It is a powder base shadow, but the way I use it you get a really good consistency.
Lets begin:- 

Follow the pictures and then read the description below:-

We are today working with the first palette . Smoky Sexy!


Step 1 -  Dampen your brush. {Use a proper eye shadow brush}. This helps the color to stick out more brighter and blends instantly against your skin.

Step 2 -  Apply a matte black shadow (first one)on your lids. Pat it lightly on your lids and you will have a rectangle sort of shape. Don't worry our second color will help us get the required shape!

Step 3 - Again dampen your brush and pick out the dull metallic  taupe (next to the matte black)and pat it just over the previous shade. Do not start blending them. Fill in the empty spaces like the end corners.

Step 4 - Now we don't want that harsh line we see in pic no.3, so we try to blend that but we use a different color this time. Now this color is called a blending color. It helps to amalgamate the two colors and adds a different dimension too.

Step 5 - Ideally you can use the sky blue in the first palette but I preferred using the silver+black shadow in palette no.2 called the Metallic CHIC.

Step 6 - Use a dry fluffy brush and pick both shadows one at a time & apply in a circular motion through out the harsh line. Do it till the harsh line becomes invisible. You WILL notice your lid color fading, go back to the matte black and touch up a little bit! Finally highlight your brow bones and inner corners using the white shadow of the Smoky Sexy palatte. Go back to the taupe shadow and apply on your lower lid as a eyeliner. And that's it.     

  •  This was just a basic smokey eye, I dint use any primer or concealer or eyeliner! I did use NYX  kajal and mascara because I just purchased them. {P.S. I will never buy NYX kajal again}.
  •  It took me a long time to get it right, So I do recommend a lot of practice and patience.{especially step 6} 
  • About the time span, This lasted well over 4 hours and then suddenly I felt something weighing  my eyes down  {not used to it}.
  • Along with the eye make-up I had done a soft subtle face make-up! Don't overdo the rest of the face. It might look jarring. 


So that was a pretty easy make-up tutorial!
C'est fini
xoxox!!!


17 March 2012

DIY PROJECT - SEQUINED COLLAR.

To Dear, World!
                          It must be a really motivating day. I plugged all my energy to settle debts with the draft section of BLOGGER. 
I have been making so many DIY's, OOTD/MOTD and so many other general news & today finally I am posting a DIY project!
Since Fall 2011, the Collar trend has been all over the place, not that I ain't liking it. I have already done a blogpost on this post here.
This is such an easy DIY, so simple, takes probably less than 15 mins and pops you different from the crowd.

DIY PROJECT :- Sequined Collar Shirt.
Things you need :- A shirt, Fabric Glue, Sequin Lace {Colour of your choice} and scissors.

Lets Begin.
Step 1 - Buy 4 meters of sequin lace. In India, you will find this easily from a saree's border shop. You also need  to buy a good fabric glue if you don't have one.
Step 2 - Take out your most boring shirt with a collar and start working with it.
              Cut strips of the sequin lace in accordance with the length of your collar.
NOTE - place your collar flat without any wrinkles.You can also work with the height of the collar.  I did both of them.
TRY THE FOURTH PICTURE IF YOU DIN'T UNDERSTAND.
Step 3 - Glue the strips to your collar and viola you are Done!


Notice how I messed up with the direction?


SOME USEFUL TIPS -

  • Understand your Sequin lace, is it stitched? is it glued to a ribbon?
  • If it is a stitched sequined lace then glue all strips ONLY in ONE DIRECTION of the thread.{second picture}
  • Wait for atleast 2 hours for the glue to dry and 5 hours to wear it.
  • Handwash is preferable and I have tried it doesn't harm your collar. NO MACHINE WASH.
  • You may notice that your collar is stiff and not easy to work with. Try it the second time and you won't notice a thing.

 So that was it, Not only its easy but also very cheap! I already had the glue but I think the total cost including glue would be somehwhere near Rs.100/- or $5.

Send me pictures on my FB page, comment section below or email ID if you tried it or already had some Diy on this. Would be glad to see them.
I hope you guys enjoyed!

C'est fini
xoxox!


Related Posts Plugin for WordPress, Blogger...